


Installing your fish finder the correct way will ensure that you get the most out of it. Taking a little extra time and effort to do it properly the first time will lead up to a lot of enjoyable fishing outings ahead!
This guide details the installation of a fish finder on a boat, if you are trying to install a transducer on a fishing kayak a lot of the same principles apply.
Table of Contents
Step 1: Figure out where to mount the transducer
This is by far the most important and most sensitive step of the installation. Most units ship with a transom mount transducer, which you can easy install at home with tools you can find in your garage or shed. If you opted for a thru-hull transducer, it is best to have it done professionally as the installation is a lot more complicated and involves cutting a hole in the bottom of your boat!
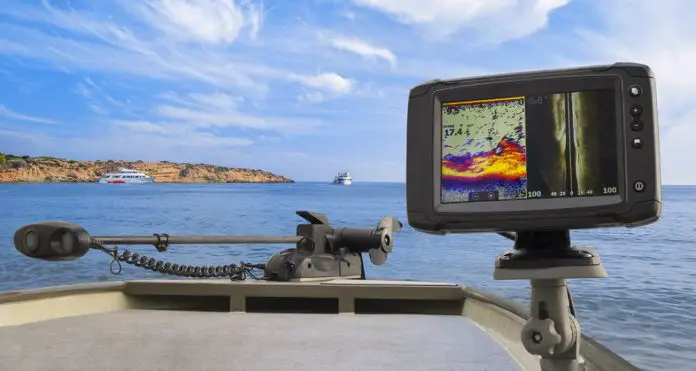
If you want to install the transducer on a trolling motor then you may want to take a look at this post where we detail the process.
Some people advocate finding a place for your fish finder first, saying that you need to know where to run the wires to. It is more practical to first install the transducer then see how far the wires run – you can move your fish finder unit around, but your transducer has to go on the transom!
Look on the hull for a spot that always stays submerged in the water. Your transducer has to be in contact (preferably submerged) with the water at all times, otherwise it won’t function! You should also take into account how smooth that part of the transom is, how far away from the propeller it is (preferably 12-14″), and if there is anything nearby that might disturb the flow of water. The more turbulence there is, the more disturbance there will be in the reading.
You should also consider where the position of the transducer will be when your boat is trailered – make sure it’s situated in a way that it doesn’t get bumped around.
Make sure that the transducer sits perfectly horizontal.
Step 2: Test-run the wires
Before we actually screw the transducer in, it’s good to test-run the wires from it to the main unit and from the main unit to the battery. If we did it after screwing it in, an accidental tug on the wire might cause the sealant we will apply to seal the holes to loosen.
If your wires are a little long, DO NOT cut them! Cutting wires in any way will VOID your manufacturer’s warranty! Instead, coil and clamp the wires or fasten them with ties near the main unit, NOT near the transducer.
WARNING: Do not run the transducer wire with the engine’s wiring harness or the VHF cable as this can cause interference that will mess up the fish finder’s performance.
Step 3: Mount the transducer
Once you have found a good spot, stick a plastic block on it – you will mount the transducer on this block, so you don’t have to drill any unnecessary holes in your boat. Allow enough time for the block’s epoxy or glue to dry and stick strongly.
Place the transducer on the block in a position as discussed above, and mark the holes with a pencil. This is where you will be drilling.
If you choose to fasten the transducer directly on the transom, mark the two holes, and drill through them. Screw the transducer in using the mounting hardware that came in the box, and apply a generous amount of silicone sealant on both holes both INSIDE and OUTSIDE – this will make sure that no water will leak through from anywhere – that could be quite a problem!
Even if you are using a plastic block, it’s always a good idea to use sealant, just in case the hole you drilled touched the transom or made a hole in it.
Step 4: Run the wires
Now that you know how to run the wires, it’s time to do the actual running! There are two ways you can do this: either above the transom, or through a hole in the transom. Make sure that if you drill a hole in the transom, it is WELL ABOVE the water level!
It’s good to secure the wire by clamps or ties every 18 inches or so. This way, they will stay put and not move around too much.
You also have to run cables from the power source to the main unit. Most manufacturer’s cables come with a fuse built in. DO NOT remove this fuse! A power surge can fry your unit! If there isn’t already a fuse, it’s a good idea to install one! Remember when connecting to the power source that red is positive and black is negative.
Leave the terminals disconnected as you complete your installation. You can fasten them with whatever kind of connectors you find more convenient.
Step 5: Mount the fish finder
By now, you should have a mounted transducer and wires running from the transducer to your chosen location for your fish finder, and from your power source to your fish finder location.
If your boat has a dashboard, most fish finders have optional in-dash mounts(sold separately) that you can use. Trace the area on your dash with a pencil, and cut it out very carefully. If you cut out too much, you won’t be able to fix it!
Most manuals come with very straightforward instructions on how to assemble and fix fish finder mounts.
Step 6: Enjoy!
Once everything is fixed and your sealant has had more than enough time to dry, it’s time to take your boat out on the water! Assuming you did everything correctly and the transducer is mounted properly, you should start getting readings right away!
Now it’s up to you to fine tune and tweak the settings so you get the best performance as per your style and requirements.
Good luck!
By Shabbir Nooruddin


")


