


Installing a fish finder can seem tricky, but it’s easy when you are prepared! Here is a checklist of things you will need.
What extras you will need:
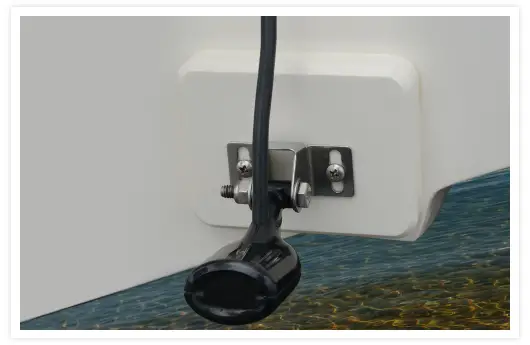
Plastic Block: Installing the transducer is the most important step, so this has to be done perfectly! Since you will be drilling holes in the transom, some anglers prefer to use a plastic block that they fix on the transom, and then mount the transducer on that, so you don’t need to drill new holes every time you upgrade(or add a second transducer)
Sealant: There is a bit of debate in the fish finding world about which sealant should be used: silicone sealant, 3M 5200 adhesive/sealant, or regular marine sealant – everyone says their particular choice is the best, so you are good with whichever is readily available to you.
Depending on the type of boat you have, you will need some way of running the wires from the transducer(which will be mounted all the way back on the transom) to the main unit. You will need to secure the wires somehow, either by a clamp, or some sort of tubing.
What tools you will need:
- Philips head screwdriver
- Drill with assorted bits
- Center punch and hammer
- Wrench
- Masking tape
If you choose to install the fish finder flush into the dashboard, you will need the following tools:
- Jigsaw
- Scissors
- File and sandpaper


")
")

")